During or after boondocking, how do you keep your house batteries charged and in good working condition? And better yet, how do you recharge them properly? In this article, you’ll learn about four different methods for charging your house batteries and how you can effectively monitor just how much charge they have.
This article is a continuation of the Boondockers Digest series by Mark Nemeth. If you want to read the previous entries, you can find them here.
- Boondockers’ Digest Part I: Camping off the Grid
- Boondockers’ Digest Part II: Generators and Inverters
- Boondockers’ Digest Part III: The RV Battery Bank
Without further ado, let’s hear from Mark!
In the previous article, I talked about your RV house batteries and ways to improve capacity. Now, let’s talk about ways to recharge your batteries. Most RVers will charge their house batteries using one or more of the 4 methods below.
How to Recharge Your RV Batteries
Method 1: Plug into AC Power
If you plug your RV into AC power via an outlet at a campground or run a generator to provide AC power, the battery charging path is essentially identical. You’ll be using whatever built-in charger your RV came with to recharge your house batteries.
Many RVs come with very low-tech chargers for this purpose. Often called “converters” these devices are intended to produce 12VDC power to run your lights, fans and appliances when you plug in the RV, and most converters are very poor battery chargers. It can be hard to determine what kind of charger you have by looking at the RV manual or at the device itself, but there’s an easy test: Simply unplug your RV from AC power and run some 12V loads for a few hours to partially discharge your house batteries. Then, using a digital voltmeter, measure the voltage at your battery bank. You should be reading something under 12.5 volts if you’ve discharged your batteries enough to test the converter.
Now, plug the RV into AC power and check the voltage again. If it is reading a steady 13.5 or so, and doesn’t change over 30 minutes, you’ve got one of those inefficient converter chargers in your RV. If, instead, you see the voltage at the batteries increase to 14V + for a while, then it falls back to 13.5 or lower, that pretty much indicates that you have a 3-stage charger.
Method 2: Use a Generator
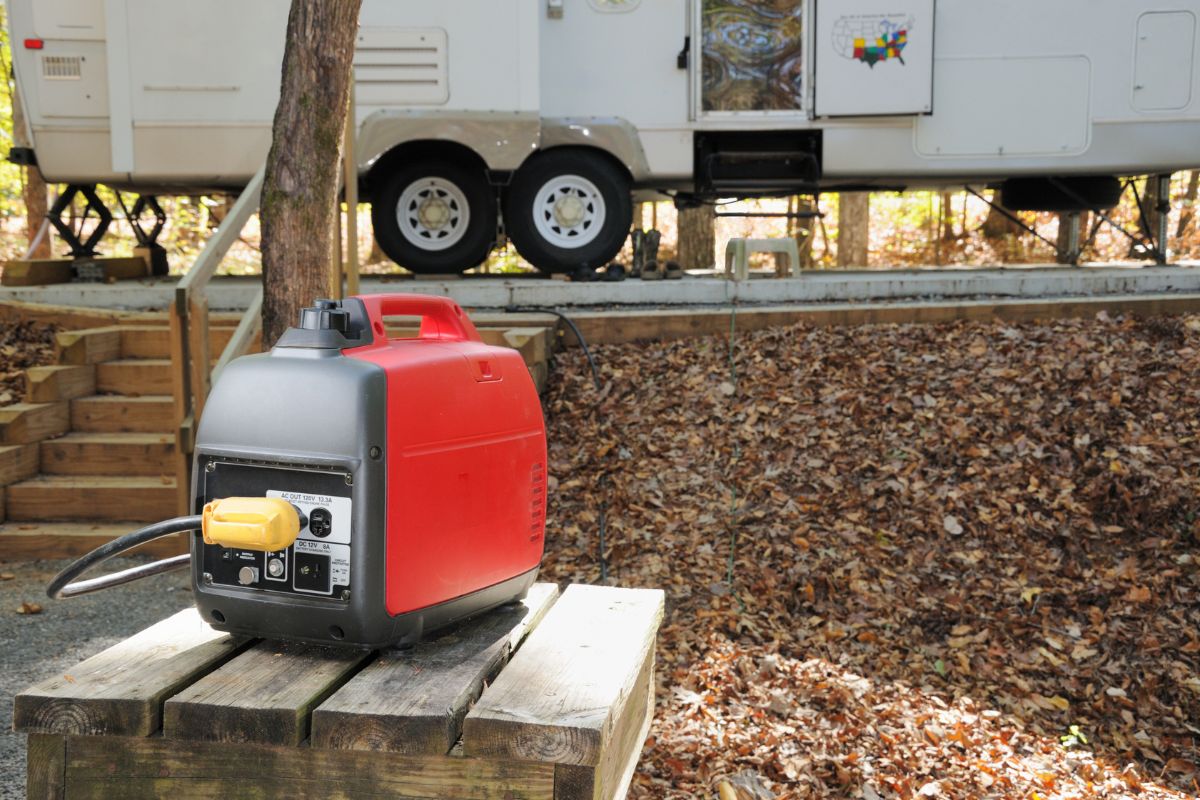
If you intend to boondock, you really need to be able to charge your battery bank quickly and efficiently. Converters are bad because the converter in your RV really isn’t designed to be a decent battery charger. It’s main purpose in life is to provide 12 volt power for your rig while you are plugged into an A/C outlet.
Since the converter is designed to not exceed a voltage of about 13.6 volts, it will never fully charge your batteries. Also, after it has succeeded in partially charging your batteries, it will hold them at a “float” voltage that is too high. This will cause most non-AGM lead-acid batteries to boil off electrolyte. If you plug your rig into A/C power for months at a time, you must keep a close eye on your battery’s electrolyte level. It is common for a converter to boil a battery dry in a month or two.
Another significant disadvantage to the converter is that most units aren’t capable of delivering their rated amperage to the batteries when powered by a generator. In fact, a 40-amp converter will struggle to produce 10 amps when powered by a generator. This has to do with the AC power factor difference, but the end result is that converters don’t play well with generators. This is a significant problem for boondockers.
Solid-state 3-stage chargers, on the other hand, work great with generator power, are lighter and more efficient and will monitor the battery bank to provide the proper voltage and current to quickly bring your batteries back to 100%.
Lead Acid Battery Charging Stages
For lead-acid batteries, the charge process takes place in 3 different stages: Bulk, Absorption and Float.
- Bulk Charge: (The first stage of 3-stage battery charging.) Current is sent to batteries at the maximum safe rate they will accept until voltage rises to near (80–90%) full charge level. Voltages at this stage typically range from 10.5 to 15 volts. There is no “correct” voltage for bulk charging, but there may be limits on the maximum current the battery and/or wiring can take.
- Absorption Charge: (The 2nd stage of 3-stage battery charging.) Voltage remains constant and current gradually tapers off as internal resistance increases during charging. It is during this stage that the charger puts out maximum voltage. Voltages at this stage are typically around 14.2 to 15.5 volts.
- Float Charge: (The 3rd stage of 3-stage battery charging.) After batteries reach full charge, charging voltage is reduced to a lower level (typically 12.8 to 13.2 volts) to reduce gassing and prolong the battery life. This is often referred to as a maintenance or trickle charge, since its main purpose is to keep an already charged battery from discharging.
Lithum Battery Charging Stages
For lithium batteries, the 3 stages are Constant Current Pre-charge Mode, Constant Current Regulation Mode and Constant Voltage Regulation Mode.
- Constant Current Pre-charge Mode: In the pre-charge phase, the battery is charged at a low rate (typically 1/10 the Constant Current Regulation Mode rate) when the battery cell voltage is below 3.0 V. This provides recovery of the passivating layer which might be dissolved after prolonged storage in deep discharge state, and it prevents overheating.
- Constant Current Regulation Mode: When the battery cell voltage reaches 3.0 V, the charger will increase the constant current and gradually increase the voltage, which is the Constant Current Regulation Mode. This mode brings the battery to approximately 80% state of charge at the fastest possible rate.
- Constant Voltage Regulation Mode: In the 3rd stage, Constant Voltage Regulation Mode, the voltage is held constant in order to prevent damage and keep batteries at a full charge and replenishes the remaining 20% of charge.
In simple terms, the charger operates in 3 stages, and each type of battery (flooded, AGM or lithium) requires specific voltage and current set points to be correctly charged. Most RV 3-stage chargers will either auto-detect the battery type or offer manual settings to select the type of battery you’re charging.
It is easier than you might think to upgrade to one. Stand-alone 3-stage chargers are designed to replace your existing converter and will offer fast and correct charging of your battery bank. I have installed quite a number of the Progressive Dynamics 3-stage chargers over the years, and they are good units. You can check them out at: www.progressivedyn.com/pd9200-converter
Because of their solid-state design, these chargers perform well on a generator, where the old transformer-based converters really struggle to make any usable charge power. I recommend a 40-amp charger if you’re only charging one or two batteries, or if your generator is a 1000W unit. A 60- or 80-amp unit is better for larger battery banks and bigger generators.
If you are already considering adding an RV inverter in the 1000- to 4000-Watt range, most have a 3-stage charger built in. When the inverter is hard-wired to your rig, it will provide AC power when you are away from hookups and will charge your batteries when you plug into AC power or run your generator. The old converter should be removed or disabled when the inverter charger is installed.
With either a stand-alone charger or an inverter charger, it is important to select the correct battery type when you install them.
Method 3: Utilize Solar Panels
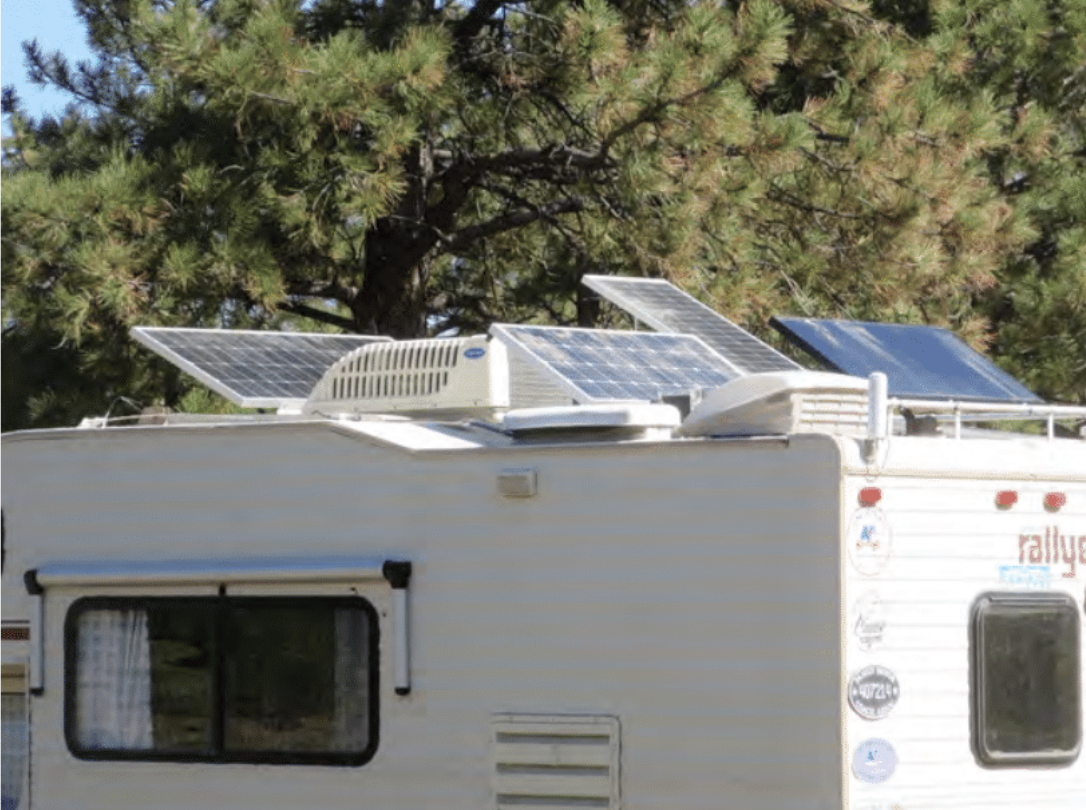
Solar systems are great for boondocking! If you have sun, these systems can recharge your battery bank and keep everything running.
Designing and installing a solar system is well within the capabilities of handy RVers and, if you prefer, there are a lot of solar companies that can set you up with a complete system. Just like sizing a battery bank, you’ll need to do some research to determine how much solar you need.
In my experience, I’d recommend at least 200 watts of solar for each 100 amp hours of battery capacity. I have 500 watts on the roof, and that allows me to fully charge my 225 Ah battery bank reliably in all but heavy overcast conditions. With full sun, I usually reach 100% charge in four to five hours.
For Escapees magazine articles that cover solar installation, visit member.escapees.com/members/magazinearchive/Default.aspx?year=2015 or for some great information and design worksheets visit www.solar-electric.com/learning-center.
Solar has never been cheaper. You can find good 100W Monocrystalline panels for well under $100 each, and a wide array of solar controllers and hardware at great prices. Best of all, solar systems can be built incrementally, starting with just a couple panels and expanding to meet your needs.
I recommend picking a panel brand and size at the beginning and sticking with that panel as you expand your system. Having matched panels will allow you to take advantage of smart MPPT solar controllers that will maximize your charge current and gives you the option of running the system at higher panel input voltages by wiring pairs or sets of panels in series.
Method 4: Drive The RV

Yes, your vehicle alternator will charge your RV house batteries! However, there are a few limiting factors. Most motorhomes have a good charge capability, because the engine alternator is close to the house battery bank. Depending on how your motorhome was wired, you may be able to get a significant recharge with a few hours of driving.
The size of the alternator and the gauge of the wiring will determine how much charge current is available. Unfortunately, most trailers and fifth wheels will have a limited ability to recharge the house batteries while driving. That’s because the tow vehicle alternator is a long distance away from the trailer battery bank, and also because the wiring is quite small. This creates a significant voltage drop and usually limits charge current to 10 amps or less.
For you trailer folks, there are ways to improve that charge path. Heavy gauge wire can be run from the alternator to a high amperage connector on the rear bumper, and similar large wire can be run from the trailer battery bank to the tongue. This helps to overcome the problems and provide a significant amount of charge current while driving. If you’d like to explore this further, check out Matt’s and Diana’s Adventurous Way blog for a series of posts on doing a full-up solar/lithium/DC to DC charger mod on an Airstream. www.adventurousway.com/blog/airstream-electrical-upgrade
Monitoring Your Battery Bank
OK, we’ve got our batteries fully charged, now let’s set up camp for the evening and put them to use. Turn on some lights, fire up the inverter and the TV and maybe warm a bite to eat in the microwave. All this activity pulls power from the battery bank, and begins to deplete the stored energy we put in.
It’s time to introduce a new term: State of Charge. When we talk about the state of charge of our battery bank, we are referring to how much of the available amp hours have been used, and how many remain before the battery is depleted. State of charge is usually expressed as a percentage. If we have used 40% of our available power, the battery bank is now at a 60% state of charge. Simple, right? But how do we determine this?
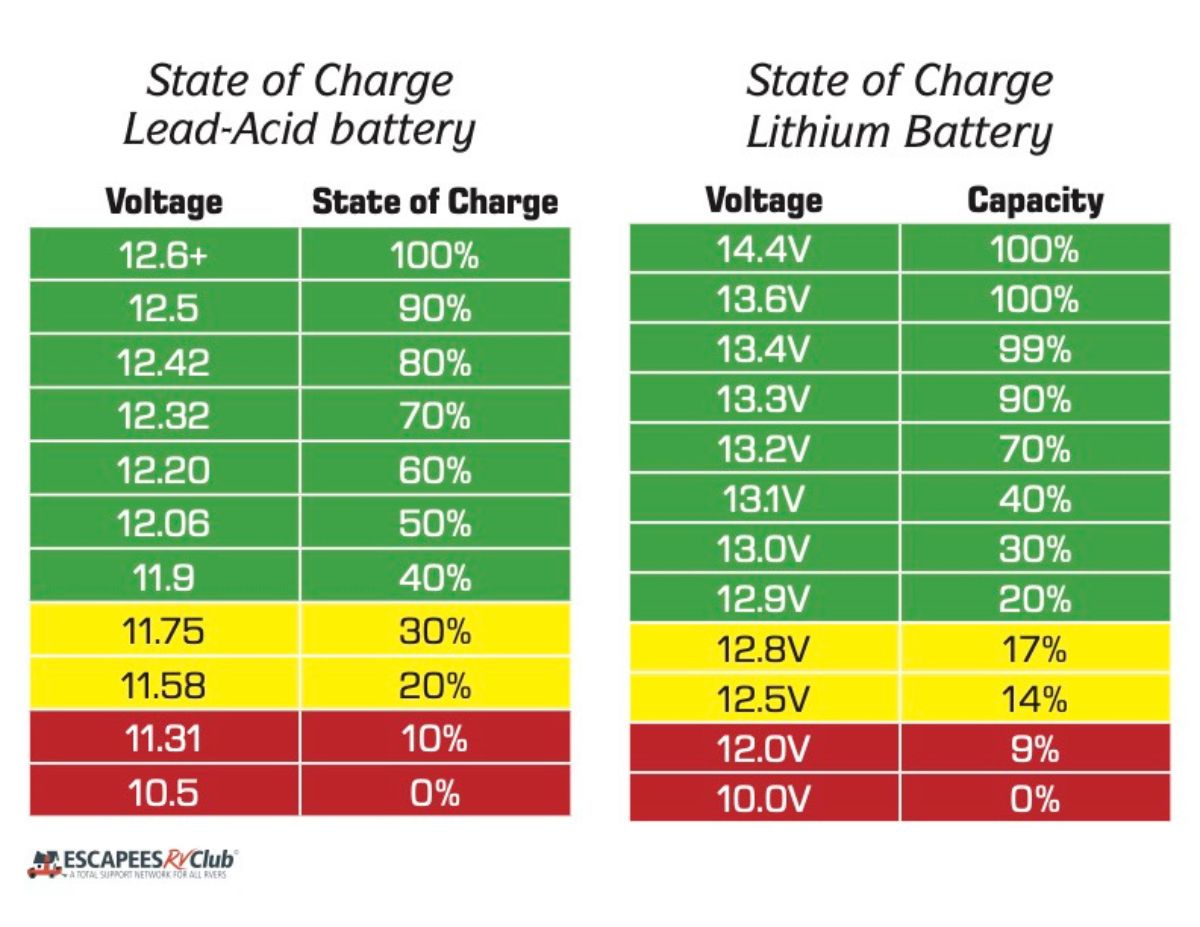
For lead-acid batteries, we can make a pretty good estimate of state of charge by measuring the battery voltage when the battery is at rest. That is when we aren’t charging it, or discharging it heavily. A simple digital voltmeter can be used to get an accurate reading of battery voltage, and the chart below can be used to determine approximate state of charge.
A battery “cycle” is one complete discharge and recharge cycle. It is usually considered to be discharging from 100% to some point not lower than 10% and then charging back up to 100%. Lead acid batteries will be damaged by really deep discharges. In fact, battery life is directly related to how deep the battery is cycled each time. If a lead acid battery is discharged to only 50% each cycle, it will last about twice as long as if it is cycled to 20%. Running the battery down totally flat will have a very negative effect on the lifespan of the battery. The chart is color coded to remind us to avoid deep discharges.
Lithium batteries can be monitored with a voltmeter, but the voltage range is much smaller, so it’s hard to determine state of charge. (See chart above).
Lithium batteries are very tolerant of deep discharges and can be repeatedly discharged to about 15% and recharged without any ill effects on the battery.
Devices to Monitor Your RV Battery Bank’s State of Charge
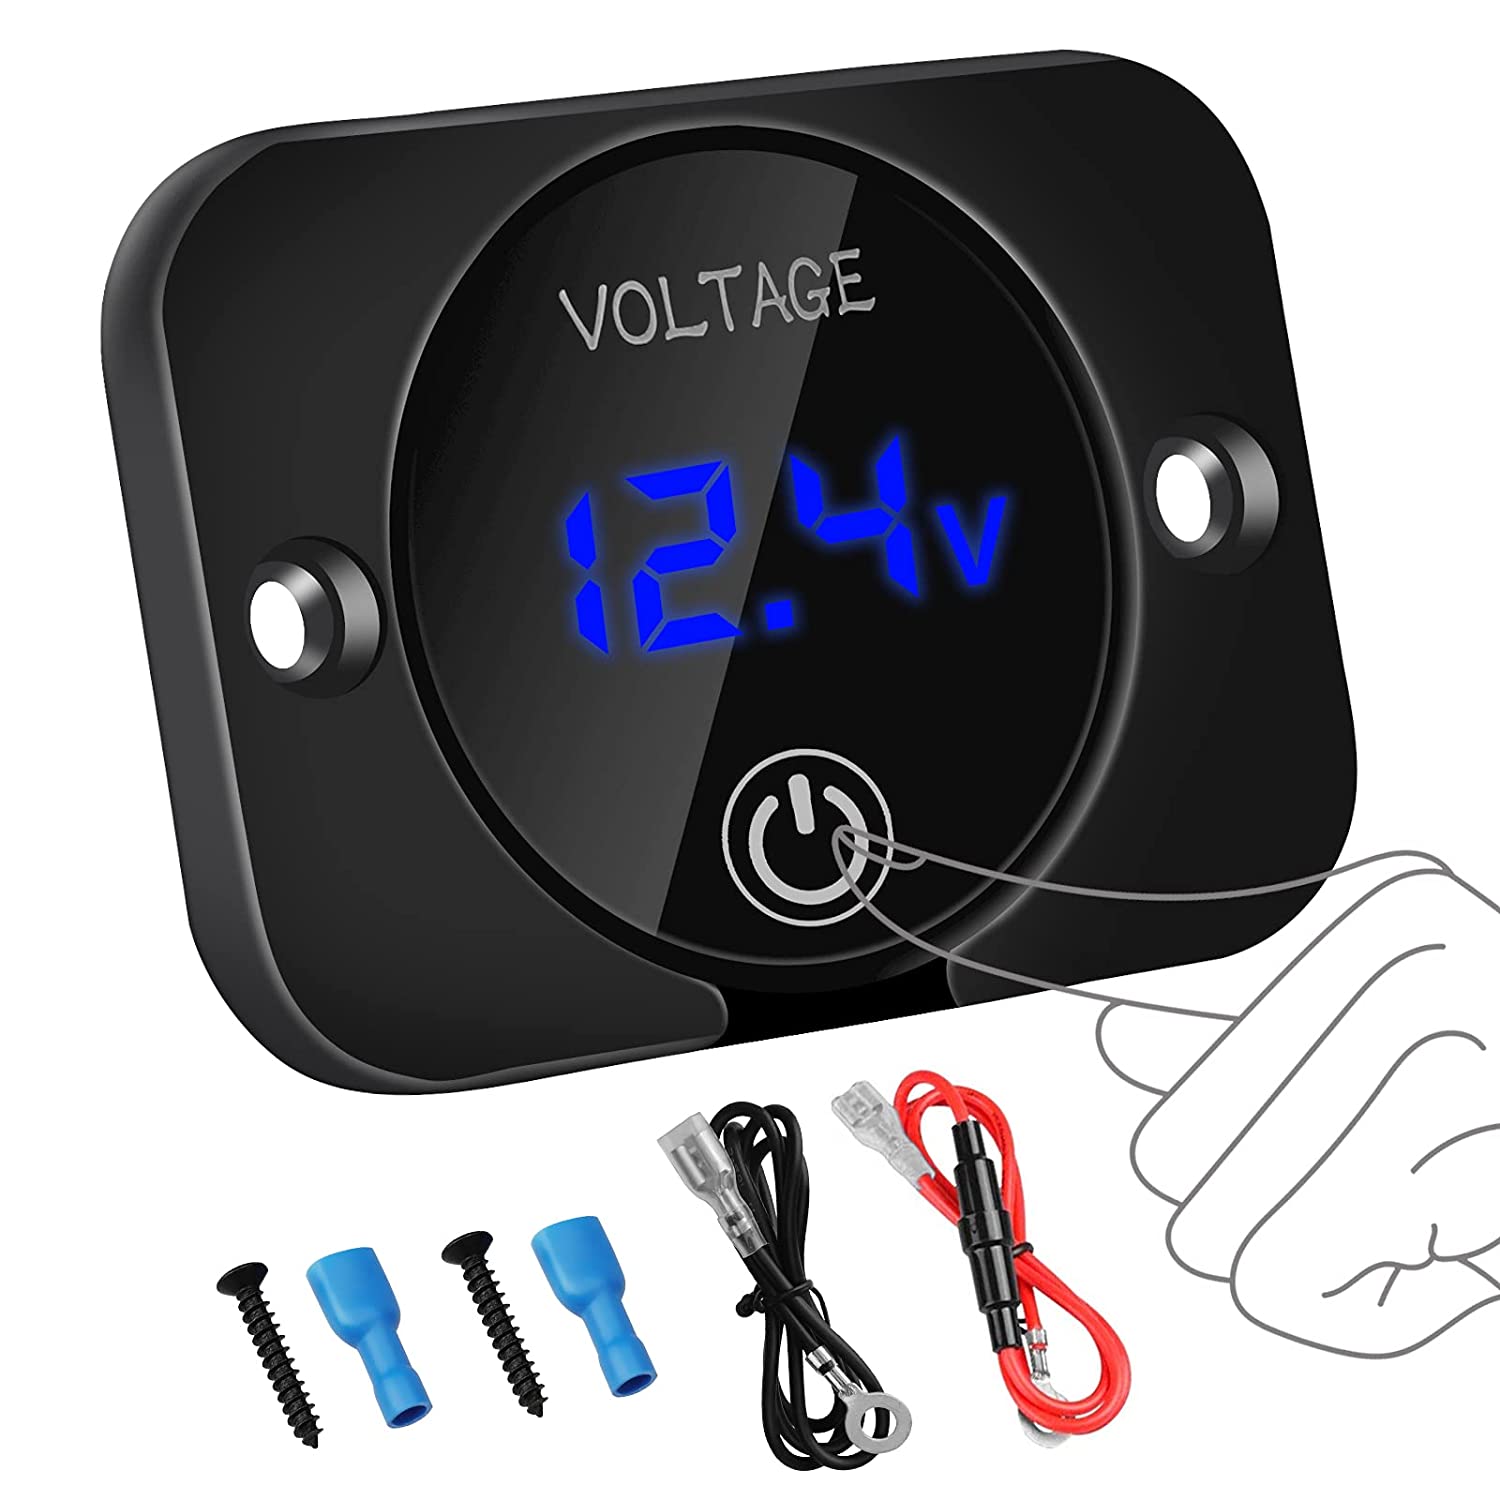
Another, more accurate, way to keep track of a battery bank’s state of charge is to use a shunt to measure current flow both into (when charging) and out of (when discharging) the batteries and to keep track of amps-in and amps-out over time. There are a number of RV battery monitoring systems available that will do this for you, and here are a few examples. All of these systems are designed to be easily installed by a handy RVer. The Victron has a lot of features and a price tag of around $200. The other two are simpler and priced under $100. They all keep track of current flow into and out of your battery bank and calculate the current state of charge and display it for you.
As you use power from your battery bank between recharge cycles, it’s a good idea to keep an eye on the state of charge. Over time, you’ll get a feel for what your typical power usage is and how well your charging methods meet your power needs. With some tweaks, you’ll be able to get a system that works for you and, as you gain confidence in your power system, you’ll be able to pay less attention to it on a daily basis.
Wrapping Up
To sum it up, being able to monitor your batteries and quickly recharge them properly are key to enjoying your boondocking adventures. Don’t let the technical aspects of all this scare you! There are amazing free resources out there to help you learn what you need to know. There are also many companies that specialize in designing and installing complete off-the-grid RV systems. You can make this happen!
In the next issue, I’ll talk about water management and cover ways to extend your stay, see you then!
Did you like this post? Pin it to Pinterest!

Author
Mark Nemeth
Mark travels in a small class-C and has made numerous modifications to his RV to enable him to boondock more easily. He’s not saying he’s an expert, or the primary source for boondocking information, but he’s done it for a number of years and is happy to share some things that he’s learned the hard way.

