By now, I hope you’ve recovered from the sadness of last Fall’s end-of-season RV winterizing task. Take heart, fellow RVer! It’s time to look forward to Spring, warmer temps, and getting your rig ready for a fantastic RV traveling and camping season!
If you are fairly new to RVing, or never had to put your RV to bed for the winter before, you might be wondering what steps to take to dewinterize your rig in the Spring. While every RV is unique, and every RVer may have their own tried-and-true methods, we’ll give you the standard steps for getting your RV dewinterized and ready to roll!
How to Dewinterize Your RV in 10 Basic Steps
- Inspect Your RV Exterior, Including The Roof and Tires
- Recharge, Inspect and Install Batteries, or Replace if Necessary
- Drain Antifreeze from Your Plumbing System
- Sanitize and Flush Your Fresh Water System
- Check for Water Leaks In Your Plumbing System
- Test Safety Devices and Alarms
- Test RV Systems and Appliances
- Have Your Propane System Inspected and Refilled
- Check Engines and Generators
- Clean Your RV Inside and Out; Wax the Rig
Okay, that may look like a long list, but if you take your time and tackle each step with care, you’ll get through the RV dewinterizing process in short order. It will be worth your time to ensure trouble-free travel and camping adventures all year long.
The 10 RV Dewinterizing Steps In Detail
1. Inspect Your RV Exterior, Including Your Roof and Tires

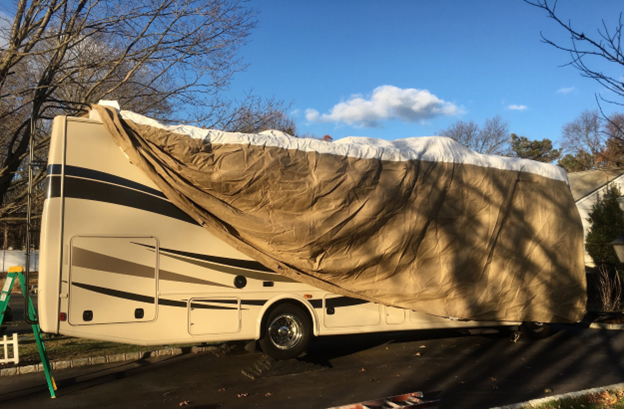
Ahh, there it is in your backyard, driveway or storage facility…your still-hibernating RV. It’s just waiting for you to breathe life back into it! The exterior is a good place to start.
Many of us like to start from the top and work our way down. Your RV’s roof protects everything underneath it and is a critical aspect of your rig’s longevity and wellbeing. Climb on up there…very carefully…and look around. Inspect all seams and seals, around the edges, the seams between the front and rear end caps, and around all fixtures on the roof:
- air conditioners
- air vents
- refrigerator vents
- antennas
- solar panels
- cable entry points, etc.
If any of the seals or caulking are cracked, peeling, or degraded, now is the time to either clean or remove old caulking, and replenish or replace it with either Dicor sealant and/or Eternabond sealing tape. (Make sure to use a sealant that is compatible with and recommended for your RV roof type, e.g. TPO/rubber, Fiberglas, etc.) RV Roof Maintenance – DIY Lap Sealant for Fiberglas Roofs

While you are up there on the roof, let’s remove the shrouds from the AC units and clean the evaporator and condenser coils. Over a season of hot summer use, followed by a long storage period, they can harbor mold, mildew and dust. A good cleaning with an HVAC spray cleaner (available at your local hardware store, Home Depot or Lowes) will ensure clean smelling air inside your RV during the coming season. Just be very careful not to damage or bend the delicate fins on the coils.

Continue with the rest of your RV’s exterior, inspecting seams, seals, gaskets, door latches, etc. Lubricate entrance and storage compartment door hinges, latches and locks. Lubricating leveling jack struts, stabilizing jacks, and slide out mechanisms with a high-quality dry silicone lubricant will have them operating smoothly at the start of the season.
Your RV’s Tires Need Inspection and Care
Make your way to your rig’s tires and inspect them for wear and any damage. Look for signs of degradation like checking or small cracks in the sidewalls. Check tire pressures for proper recommended inflation. Many veteran RVers also like to give the tires a coat of Aerospace 303 Protectant to help guard against the sun’s damaging UV radiation.

How old are your tires? Remember that RV tires, unlike automobile tires, typically “age out” not wear out. Most manufacturers recommend replacing your RV tires between 5 to 6 years regardless of how good the tread may look. See how to read your RV tire date codes here – Escapees
2. Recharge and Install Batteries or Replace if Necessary

If you removed your batteries from the RV for winter storage, make sure they are fully charged. If your batteries are older, and were having trouble holding a charge at the end of last season, it may be time for new ones. Starting the RV camping season with fresh and dependable batteries will give you peace of mind. If you have standard lead acid/wet cell batteries, you might even want to consider upgrading to AGM or lithium at this time.
With lead acid/wet cell batteries, you’ll want to check the individual cell water levels and refill as necessary using distilled water. Before reinstalling your RV batteries and connecting the terminals, make sure the casings are in good condition and that the terminals are clean and free of any corrosion. A quick spray of corrosion inhibitor on the terminals is a good practice.
By the way, a really handy accessory for maintaining lead acid battery water levels is the Qwik-Fill system by Flow-Rite. It makes checking and filling your batteries while they are in the rig much quicker and easier!

3. Drain Antifreeze from Your Plumbing System
Next up, let’s get that “pink stuff” out of your fresh water system. If you winterized with regular RV antifreeze throughout the system, rather than just blowing out the lines and adding antifreeze to drains, you’ll need to drain the antifreeze via your RV’s low-point drains, as well as flush with fresh water until it comes out clear in every faucet.

There is often debate in the RV forums and groups about how to properly dispose of used RV antifreeze. Yes, the RV variety is made of propylene glycol which is “non-toxic”, but that doesn’t necessarily make it healthy for the environment. The safest recommended method is to take it to your local recycling and hazardous waste center.
However, in the limited diluted quantities used in your RV, it is also considered fine to dump it into household drains that lead to municipal water and sewage treatment facilities. It is generally not recommended to pour the used RV antifreeze, despite being “non-toxic”, down storm drains or into rural septic systems.
4. Sanitize and Flush Your Fresh Water System
Over time, your water tank and lines can breed bacteria, mold and mildew, especially during a period of prolonged non-use like off-season storage.
Regardless of whether or not you drink the water from your fresh tank, or how often you use your RV, experts agree that RVers should sanitize their fresh water tanks and systems at least once or twice per year. Dewinterizing your RV is the perfect time to sanitize the system.
There are several methods of sanitizing your RV fresh water system, including bleach and non-bleach processes. Some RVers hesitate using chlorine bleach, but in the correct diluted PPM strength and relatively short duration of RV system sanitizing, it isn’t reported to be a problem for the system or seals.
As for concerns about the bleach solution killing the helpful bacteria and enzymes that break down waste, you should have dumped and flushed your holding tanks in the Fall and will be sanitizing with empty tanks. However, there are also a few non-bleach sanitizing methods available and it is a matter of personal preference as to which you are comfortable using.

The most common method involves using a diluted solution of ¼ cup of regular chlorine bleach to every 15 gallons of fresh water capacity (Don’t use “non-splash/low-splash” or scented bleach, which are not formulated for disinfection purposes). You can mix a small quantity first in a bucket with the full amount of recommended bleach.
The solution is then carefully poured (using eye protection) into your RV fresh water tank, the tank is filled, and then pumped through the entire system until the slight odor of bleach is noticed at each faucet. (Note that many RVers choose to bypass the water heater tank, but that is another personal choice). Let it all sit to do its thing. Using the bleach method, a good soak of at least 4 hours and up to 12 hours or less will provide adequate disinfection.
After the disinfecting soak…which can be done while you are doing the rest of your dewinterizing steps…the system is flushed well with fresh water until no bleach scent remains.

5. Check for Water Leaks In Your Plumbing System
Now that you have put your RV’s fresh water system back into service…sparkly clean I might add…you should examine all of the water lines, joints, valves and faucets for any leaks. Tighten or repair any leaking areas as quickly as possible to prevent damage to your RV.
6. Test Safety Devices and Alarms
Remember that adage about testing and changing the smoke alarm batteries in your “sticks ‘n’ bricks” home twice a year? Well, the same applies to your rolling RV home!
Run tests with the “test” buttons on your RV smoke alarms and propane/carbon monoxide detectors. Change the batteries in any of the devices not already hard-wired into the 12v RV system.
And, did you know that most detectors and alarms have a “shelf life”? They typically have expiration dates, often at five years, and then should be replaced. Again, this RV dewinterizing process is a great time to address these critical life-safety items!

7. Test RV Systems and Appliances
You’ll want to test all of your RV’s systems and appliances to be sure they are in good working order. You might be surprised by systems that worked perfectly at the end of the camping season, and now won’t work once you put your RV back into service. It is better to find that out now, troubleshoot and fix them, than to experience frustrating surprises on your first camping trip!
Make sure that all lights, switches, outlets, fans, galley appliances, refrigerator, televisions, and radios are working properly.
It is important to inspect the outside vents and flues of your water heater, refrigerator, and furnace for spider webs and bees nests, as those insects are sometimes attracted to the odor of propane. Some insects make nests in those areas which can interrupt proper operations.
If you don’t currently have screens on those vents, they are readily available at RV supply stores and online. Having screens in these areas can prevent problematic insect nesting during the camping and storage seasons.

This is also your opportunity to test other important systems before your first camping trip, such as:
- slide-outs
- awnings
- leveling jacks
- water heater
- RV furnace
- air conditioners
- converters/battery chargers
- inverters, and more depending on your specific RV model.
8. Have Your Propane System Inspected and Refilled
Ideally, RV propane systems should be inspected annually for leaks and safe operation. This can be done at your local RV dealer/service facility, by a mobile RV tech on-site, or you can do it yourself if you have the knowledge and proper gas pressure testing equipment.
At a minimum, you’ll want to check all propane system joints and valves with a simple mixture of water and dish soap, or a gas leak detector fluid available from your local hardware store or big box home improvement store.

If you have external, portable propane tanks, a trip to get them filled can be done now. If you have an on-board, RV-mounted propane tank, you’ll probably wait to get that filled the first time you head out with the RV. But, don’t forget to plan for it so you don’t arrive at your first campground site with an empty tank.
9. Check Engines and Generators
On a motorized RV or motorhome, check your engine operation and make sure all fluids are at proper levels. Your RV owner manual should list the recommended fluid types and quantities. Is your unit due for an oil and filter change, or maybe a regularly scheduled tune-up? You’ll want to get those scheduled and done before your first trip.
For onboard or portable generators, you need to wake them up from their winter’s nap. (If you didn’t drain their fuel when winterizing your rig, hopefully you treated the fuel with a gas stabilizer) Make sure the generator starts easily, runs well, and is producing smooth power at the rated specifications. Depending on your generator’s hours, an oil and air filter change may also be due. Cummins Onan RV Generator Handbook
10. Clean Your RV…Outside and Inside

Okay, you’ve done a lot of work up to this point. All systems are hopefully good-to-go. You are at the final step…Spring Cleaning!
Starting from the roof again, give your RV a bath with a good automotive wash product. Once it is nice and clean, and if you didn’t do it at the end of last season, give your rig’s finish a good waxing with a high quality RV or marine wax and polish. Some RV owners also apply a UV protectant to the roof after washing it.
You can wash and wax your RV yourself with time and “elbow grease”. Or, you can have a mobile RV Wash & Wax service come to your home and detail your rig. Pricing is usually by the foot and can vary greatly between vendors and geographic locations.

Moving to the inside of the RV, begin cleaning up high and work down, dusting and polishing the surfaces. Vacuum the floors and carpeting, and damp-mop vinyl floors.
Here’s a great Escapees article, by Donna Smallin Kuper, with many smart tips for cleaning the inside of your RV: “How to Clean Your RV…And Keep it Clean”.
Extra Spring Cleaning Tips While Dewinterizing Your RV
- Wash all linens, towels, and bedding.
- Open all windows and roof vents to circulate fresh air.
- Clean the insides of all windows.
- Remove window and roof vent screens, clean and reinstall.
- Remove, clean, and reinstall your AC filters.
- Inspect every corner and crevice for signs of insect and rodent damage or nesting.
After Dewinterizing Your RV – Now What?

First, you deserve a break after all that work! Kick back with a refreshing beverage, looking at your now dewinterized, clean and read-to-go RV. Enjoy knowing that your rig is in great condition and sound working order. It’s now ready to take you and your family on many new adventures!
What’s next? It’s time to go camping, have fun and make great memories!